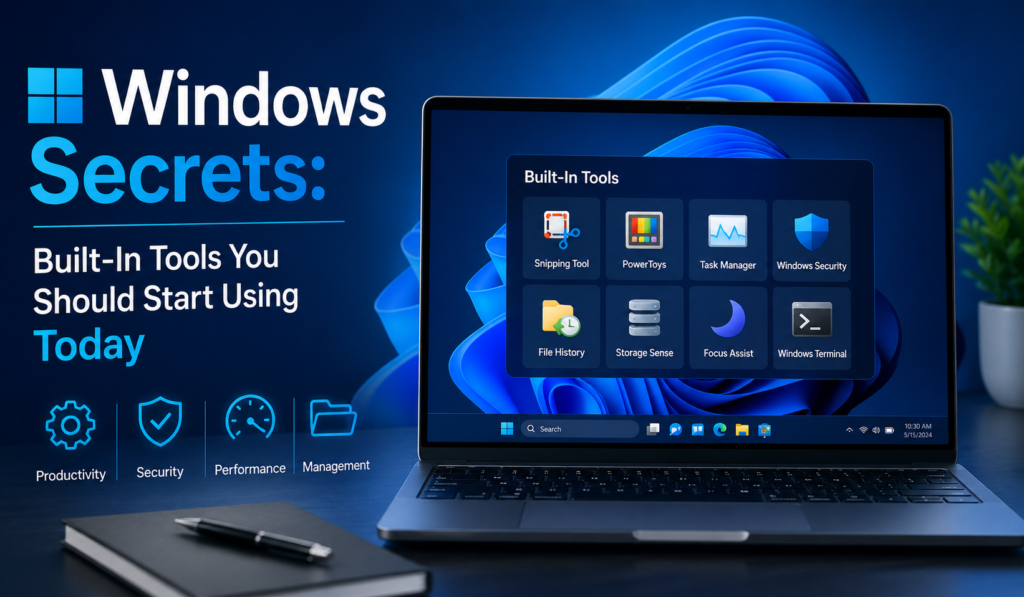
Windows Secrets: Built-In Tools You Should Start Using Today

1. Introduction

Built-in Windows tools are like hidden power-ups: they sit there, free and ready, but most people never learn how to use them. Instead, many reach for third-party utilities (sometimes insecure or bloated) when Windows already includes fast, reliable tools for troubleshooting, performance tuning, and everyday productivity.

Why Most Users Ignore Powerful Built-In Tools

  • They don’t know these tools exist or what they do.
  • The interface is sometimes terse or technical, which scares casual users.
  • Marketing pushes third-party apps that promise one-click fixes.

Hidden Productivity & Troubleshooting Features
Windows includes features that can save hours: quick diagnostics (Memory Diagnostic), deep logs (Event Viewer), safe repair paths (MSConfig), and productivity helpers (Snipping Tool, Task Manager shortcuts). Learning a few of these tools means faster problem resolution, fewer unnecessary installs, and better long-term stability.

Who This Guide Is For

  • Beginners who want to fix common Windows problems without risky downloads.
  • Power users who want to squeeze more performance and control from their machine.
  • IT helpers and freelancers who need reliable, repeatable troubleshooting steps.

Table of Contents

2. Task Manager — More Than Just “End Task.”

Task Manager is the most approachable advanced tool in Windows. Most people open it only to kill a frozen program — but it can do much more: performance monitoring, startup control, service inspection, and quick access to process details.

How to Open Task Manager Quickly

  • Keyboard: Ctrl + Shift + Esc — immediate.
  • Alternate: Ctrl + Alt + Del → choose Task Manager.
  • Power user: Win + XTask Manager (or right-click Start).
  • From Run dialog: taskmgr → Enter.

Switch to More details to unlock the full UI (if Task Manager opens in compact mode).

Performance Monitoring (CPU, RAM, Disk, GPU)

  • Open the Performance tab to see live graphs for CPU, Memory, Disk, Network, and GPU.
  • Key metrics and what they mean:
    • CPU: Look for sustained high usage (80–100%) — indicates heavy processes or background tasks.
    • Memory: Check committed vs. physical memory. High memory usage can slow down app switching.
    • Disk: Spikes or steady 100% usage cause sluggish responsiveness (often indexing, updates, or misbehaving apps).
    • GPU: Important for gaming/video work — shows GPU engine and VRAM usage.

Pro tip: Click a graph to pin a small summary to the toolbar for continuous monitoring.

Startup Management for Faster Boot

  • Go to the Startup tab. It lists apps that launch at sign-in.
  • Important columns: Startup impact (None, Low, Medium, High) and Status (Enabled/Disabled).
  • Disable nonessential high-impact apps (cloud sync tools, chat apps, updaters) to reduce boot time.
  • Right-click → Open file location if you want to identify the executable before disabling.

Identifying Resource-Heavy Apps

  • In Processes, click column headers (CPU, Memory, Disk, Network, GPU) to sort — highest usage appears first.
  • For more detail: right-click a process → Go to details (or Open file location, Search online) to learn what the process does.
  • Use Analyze wait chain (right-click a hung process in the Details tab) to see whether another process is blocking it.

Quick Task Manager Tips

  • Use End task only for unresponsive apps; closing system processes can crash Windows.
  • Right-click processes to set Priority (beware: only temporary for that session).
  • Use the App history tab to review resource usage over time (useful on shared/managed machines).

3. System Configuration (MSConfig)

MSConfig (System Configuration) is a classic troubleshooting tool for controlling how Windows starts. It’s extremely useful when diagnosing boot problems or isolating troublesome startup items and services.

How to Open MSConfig

  • Press Win + R, type msconfig, and press Enter.
  • Or search for msconfig from the Start menu.

Tabs you’ll use most often

  • General
    • Normal startup: default (all drivers and services load).
    • Diagnostic startup: minimal drivers and services — good for isolating issues.
    • Selective startup: choose which system services and startup items to load.
  • Boot
    • Set Safe boot options (Minimal, Alternate shell, Active Directory repair, Network).
    • Use Timeout to change the boot menu wait time.
  • Services
    • Lists all system and third-party services. Use Hide all Microsoft services to avoid disabling critical Windows services, then uncheck suspect third-party services.
  • Startup
    • On modern Windows this opens the Task Manager’s Startup tab (where you should manage startup apps).
  • Tools
    • Quick links to useful system utilities (Event Viewer, System Information, etc.)

Managing Startup Services

  • Troubleshooting approach:
    1. Open Services tab, check Hide all Microsoft services.
    2. Uncheck services you suspect (third-party updaters, helpers).
    3. Reboot and test. If problem resolves, re-enable services one at a time to find the culprit.
  • Best practice: document which services you change and create a restore point beforehand.

Safe Boot Options

  • Minimal — basic Windows GUI, no network. Good for driver or software conflicts.
  • Alternate shell — boots to a command prompt (rarely used by casual users).
  • Network — minimal GUI but with networking; useful to download fixes while in Safe mode.
  • Active Directory repair — used on domain-joined machines to repair server/AD issues.

When to Use MSConfig

  • Intermittent crashes or startup failures.
  • Suspected problematic startup services or apps.
  • Preparing for malware cleanup (boot to Safe mode to run scanners).
  • When you need to test Windows with minimal drivers to isolate hardware vs. software issues.

Safety & Recovery Tips

  • Always create a System Restore point before making wide changes.
  • Don’t disable services if you aren’t sure what they do — Google the service name or use Open file location in Task Manager to identify the program first.
  • If booting into Safe mode via MSConfig, remember to revert the Safe boot setting when done (otherwise Windows may keep booting to Safe mode).

4. Disk Cleanup & Storage Sense

Over time, Windows accumulates temporary files, cached update packages, thumbnails, error logs, and leftover installation files. While these files help the system operate smoothly, they can consume significant disk space — especially on smaller SSDs. Thankfully, Windows provides safe, built-in tools to clean up storage without risking system damage.

Freeing Up Disk Space Safely

The safest way to clean your drive is by using the built-in Disk Cleanup utility.

How to Open Disk Cleanup

  • Press Win + R
  • Type cleanmgr
  • Press Enter
    OR
  • Search Disk Cleanup in the Start menu

How It Works

  1. Select your system drive (usually C:).
  2. Windows scans for removable files.
  3. You’ll see categories such as:
    • Temporary Internet Files
    • Recycle Bin
    • Thumbnails
    • Temporary files

Check the boxes for items you want to remove, then click OK.

Cleaning System Files (Important Option)

Click “Clean up system files” to unlock advanced cleanup categories, including:

  • Windows Update Cleanup
  • Previous Windows installations (Windows.old)
  • Device driver packages
  • System error memory dump files

⚠️ Only remove “Previous Windows installation” if you’re sure you won’t need to roll back to an earlier Windows version.

Removing Temporary & System Files

Modern versions of Windows also include a more visual storage management interface.

Using Storage Settings

  1. Go to Settings → System → Storage
  2. Click Temporary files
  3. Select categories to remove, such as:
    • Temporary files
    • Windows Update cleanup
    • Delivery Optimization files
    • DirectX shader cache

Windows clearly displays file sizes so you can see how much space you’ll recover.

Clearing the Temp Folder Manually (Advanced)

For deeper cleanup:

  1. Press Win + R
  2. Type %temp%
  3. Press Enter
  4. Delete files inside the folder (skip those in use)

This removes leftover temporary files from applications that didn’t clean up properly.

Automating Cleanup with Storage Sense

Instead of manually cleaning your PC, you can enable Storage Sense, Windows’ automatic cleanup feature.

How to Enable Storage Sense

  1. Go to Settings → System → Storage
  2. Turn on Storage Sense
  3. Click Configure Storage Sense or run it now

What Storage Sense Can Do

  • Automatically delete temporary system files
  • Empty Recycle Bin after a set number of days
  • Remove files in Downloads after a defined period
  • Manage cloud-synced content

Recommended Settings

  • Run every month
  • Delete Recycle Bin files after 30 days
  • Automatically remove temporary files

This keeps your system optimized without manual maintenance.

5. Windows Security (Built-In Antivirus)

Windows includes a powerful security suite called Microsoft Defender Antivirus, managed through the Windows Security dashboard. It provides real-time protection, firewall management, ransomware defense, and device security — without requiring third-party antivirus software.

Virus & Threat Protection

This section protects your system from malware, viruses, spyware, and other threats.

Real-Time Protection

  • Continuously scans files and applications.
  • Blocks suspicious downloads automatically.
  • Monitors background processes for unusual behavior.

Scan Options

  • Quick Scan – Scans critical system areas.
  • Full Scan – Checks the entire system.
  • Custom Scan – Targets specific folders.
  • Offline Scan – Restarts and scans before Windows loads (useful for persistent malware).

Protection History

Shows:

  • Blocked threats
  • Quarantined files
  • Allowed items

Firewall & Network Protection

The built-in firewall controls network traffic to prevent unauthorized access.

What It Protects Against

  • Hackers attempting remote access
  • Malicious software sending data out
  • Suspicious inbound connections

Network Profiles

  • Private network (home)
  • Public network (airport, café)
  • Domain network (workplace)

Keep the firewall enabled on all profiles, especially on public networks.

You can also configure:

  • App-specific firewall permissions
  • Inbound and outbound rules
  • Advanced security policies

For most users, default settings are sufficient.

Ransomware Protection Features

Ransomware encrypts files and demands payment. Windows includes Controlled Folder Access to prevent unauthorized file changes.

How It Works

  • Protects folders like Documents, Pictures, and Desktop.
  • Blocks unknown apps from modifying files.
  • Sends alerts when suspicious activity occurs.

How to Enable

  1. Open Windows Security.
  2. Go to Virus & Threat Protection.
  3. Click Manage ransomware protection.
  4. Turn on Controlled folder access.

You can also:

  • Add additional protected folders
  • Allow trusted apps manually

This adds an important extra layer of protection against modern threats.

6. Event Viewer – Diagnose Hidden Problems

When Windows crashes, freezes, or behaves strangely, the answer is often recorded inside Event Viewer. This tool logs system events, warnings, and errors in detail.

Understanding Windows Logs

To open:

  • Press Win + R
  • Type eventvwr
  • Press Enter

On the left panel, expand Windows Logs:

  • Application – Application errors and crashes
  • System – Driver and system component events
  • Security – Login attempts and security events
  • Setup – Installation-related events

Event Levels

  • Information
  • Warning
  • Error
  • Critical

Focus on Error and Critical entries when troubleshooting.

Finding Error & Critical Events

To filter logs:

  1. Click System
  2. Select Filter Current Log
  3. Check Critical and Error
  4. Click OK

Now you’ll see only serious issues.

Click an event to view:

  • Event ID
  • Source
  • Time
  • Detailed description

You can search online using the Event ID to find solutions.

Troubleshooting System Crashes

If your PC crashes unexpectedly:

  1. Open System log.
  2. Look for events marked Critical.
  3. Check timestamps that match the crash time.

Common crash indicators:

  • Kernel-Power errors (unexpected shutdown)
  • Driver failures
  • Disk errors
  • Update-related failures

Pair Event Viewer with Reliability Monitor for a clearer picture — Reliability Monitor shows a timeline, while Event Viewer shows detailed logs.

Why These Tools Matter

Disk Cleanup and Storage Sense maintain storage health.
Microsoft Defender protects against threats.
Event Viewer reveals hidden system issues.

Together, they provide a powerful built-in maintenance and security system — no extra software required.

7. Reliability Monitor – The Secret Stability Tool

The Reliability Monitor is one of the most underrated built-in tools in Microsoft Windows. While most users check Task Manager when something goes wrong, Reliability Monitor gives you a timeline-based history of system stability, making it much easier to diagnose recurring issues.

How to Access Reliability Monitor

You can open it in several ways:

  • Press Win + R, type perfmon /rel, and press Enter.
  • Search for “Reliability Monitor” in the Start menu.
  • Go to Control Panel → Security and Maintenance → Maintenance → View reliability history.

Within seconds, you’ll see a graph showing your system’s stability score from 1 to 10.

Reading the Stability Timeline

The timeline displays:

  • Application failures (App crashes)
  • Windows failures (System errors, blue screens)
  • Hardware errors
  • Warnings
  • Successful updates

Each day is marked with icons:

  • Red X = Critical error
  • Yellow warning triangle = Warning
  • Blue information icon = Informational event

Click on a specific day to see detailed technical information about what failed and when.

Fixing Frequent Application Crashes

If you notice the same program crashing repeatedly:

  1. Click the red X on the timeline.
  2. View technical details.
  3. Check:
    • Faulting module name
    • Error code
    • Windows update was installed that day

Common fixes include:

  • Updating the application
  • Reinstalling the program
  • Updating drivers
  • Running System File Checker (SFC)

Reliability Monitor helps you spot patterns, which is far more powerful than guessing the cause of a problem.

8. Command Prompt & PowerShell Basics

Both Command Prompt and PowerShell are powerful administrative tools built into Microsoft Windows. While they may look intimidating, even basic commands can solve serious problems quickly.

Useful Everyday Commands

Here are some simple but powerful commands:

  • ipconfig → View network information
  • ipconfig /flushdns → Clear DNS cache
  • chkdsk → Check disk for errors
  • tasklist → View running processes
  • shutdown /r /t 0 → Restart immediately

These commands can help fix internet issues, disk errors, and performance problems without installing third-party tools.

Running System File Checker (SFC)

To scan for corrupted system files:

  1. Open Command Prompt as Administrator.
  2. Type:sfc /scannow
  3. Press Enter and wait.

The system will scan and automatically repair corrupted Windows files if possible.

Using DISM for Advanced Repairs

If SFC cannot fix the issue, use DISM:

DISM /Online /Cleanup-Image /RestoreHealth

DISM repairs the Windows image itself, which SFC relies on. After running DISM, you should run SFC again for best results.

PowerShell offers even more advanced automation and scripting features, making it ideal for IT professionals and advanced users.

9. System File Checker (SFC)

Although mentioned above, System File Checker deserves its own section because of how powerful it is for troubleshooting Windows problems.

What It Does

System File Checker:

  • Scans protected system files
  • Detects corrupted or missing files
  • Replaces them with a cached clean copy
  • Helps fix crashes, startup issues, and random errors

It works silently in the background and does not delete personal files.

How to Scan and Repair Corrupted Files

Follow these steps:

  1. Right-click Start → Choose Command Prompt (Admin) or Windows Terminal (Admin).
  2. Type:sfc /scannow
  3. Wait for the scan to complete (may take 10–20 minutes).

Possible results:

  • No integrity violations found
  • Corrupted files found and repaired
  • Corrupted files found but could not be repaired (Use DISM next)

When to Use It

Use SFC when:

  • Your PC crashes unexpectedly
  • Built-in apps stop working
  • Windows features fail to open
  • After a malware removal
  • After a failed update

It’s one of the safest troubleshooting tools available because it only targets protected system files.

10. Windows Memory Diagnostic

Random crashes, blue screens, and application freezes are often blamed on software — but sometimes the real issue is faulty RAM. The Windows Memory Diagnostic tool built into Microsoft Windows helps detect memory (RAM) problems without installing third-party utilities.

Detecting RAM Problems

Faulty memory can cause:

  • Random system crashes (BSOD)
  • Programs closing unexpectedly
  • System freezing during heavy tasks
  • Installation failures
  • Corrupted files

Since RAM issues are hardware-related, software fixes alone won’t solve them. That’s where Windows Memory Diagnostic becomes useful.

How to Run the Tool

You can start the test in a few simple steps:

  1. Press Win + R
  2. Type mdsched.exe
  3. Press Enter
  4. Choose:
    • Restart now and check for problems
    • Check for problems the next time I start my computer

Your PC will restart and begin testing memory automatically.

During the test:

  • A blue screen appears
  • Progress percentage is displayed
  • You can press F1 for advanced options (Basic, Standard, Extended tests)

The Extended test is more thorough but takes longer.

Understanding Test Results

After the test completes, Windows restarts normally. Results appear as a notification in the system tray.

Possible outcomes:

  • No errors found → RAM is likely healthy.
  • Hardware problems detected → One or more RAM modules may be faulty.

If errors are found:

  • Reseat RAM modules (if comfortable opening your PC).
  • Test sticks individually.
  • Replace faulty memory if needed.

This tool helps confirm whether crashes are hardware-related before spending money on repairs.

11. Device Manager – Control Your Hardware

Device Manager is your control center for hardware in Microsoft Windows. It allows you to view, manage, update, enable, disable, and troubleshoot all connected devices.

Updating Drivers

Outdated drivers can cause:

  • Poor performance
  • Hardware not working properly
  • Crashes or compatibility issues

To update a driver:

  1. Right-click Start → Select Device Manager
  2. Expand a category (e.g., Display adapters)
  3. Right-click the device → Choose Update driver
  4. Select Search automatically for drivers

You can also install drivers manually from the manufacturer’s website if needed.

Fixing Unknown Devices

If you see a yellow warning icon:

  • It indicates missing or problematic drivers.
  • Right-click → Properties → Check Device status.
  • View the Hardware IDs under Details to identify the device.
  • Download the correct driver from the official manufacturer.

Unknown devices are common after a fresh Windows installation.

Enabling & Disabling Hardware

Device Manager also allows you to:

  • Disable unused hardware (like an old webcam)
  • Enable disabled network adapters
  • Uninstall problematic drivers
  • Roll back drivers if a recent update caused issues

Driver rollback is especially helpful if your PC started malfunctioning after a driver update.

Device Manager gives you precise hardware-level control without needing external tools.

12. Resource Monitor – Advanced Performance Tracking

While Task Manager shows basic usage statistics, Resource Monitor provides a much deeper look into system activity in Microsoft Windows.

It helps diagnose performance bottlenecks with greater precision.

How to Open Resource Monitor

  • Press Win + R
  • Type resmon
  • Press Enter

Or open Task Manager → Performance tab → Click Open Resource Monitor.

Monitoring CPU, Disk, Network Usage

Resource Monitor provides detailed tabs for:

CPU Tab

  • Shows which processes are using CPU
  • Displays associated services
  • Shows threads and handles

Memory Tab

  • Displays used, standby, free memory
  • Identifies memory-hungry processes

Disk Tab

  • Shows real-time disk activity
  • Displays read/write speeds
  • Identifies which file each process is accessing

Network Tab

  • Shows active TCP connections
  • Displays send/receive rates
  • Identifies which apps use internet bandwidth

This level of detail helps pinpoint the exact cause of slow performance.

Identifying Background Processes

If your PC feels slow but Task Manager doesn’t show obvious issues, Resource Monitor can reveal:

  • Hidden background services
  • Disk-intensive applications
  • Programs constantly accessing the network
  • Processes waiting on hardware resources

You can also right-click processes to:

  • End process
  • Analyze wait chain (see what’s blocking a process)
  • Search online for more information

When to Use Resource Monitor Over Task Manager

Use Resource Monitor when:

  • Disk usage is stuck at 100%
  • Internet feels slow but bandwidth seems normal
  • CPU usage spikes randomly
  • You need to see which specific file a program is accessing
  • Troubleshooting advanced performance issues

Task Manager is great for quick checks. Resource Monitor is better for deep diagnostics.

10. Windows Memory Diagnostic

Random crashes, blue screens, and application freezes are often blamed on software — but sometimes the real issue is faulty RAM. The Windows Memory Diagnostic tool built into Microsoft Windows helps detect memory (RAM) problems without installing third-party utilities.

Detecting RAM Problems

Faulty memory can cause:

  • Random system crashes (BSOD)
  • Programs closing unexpectedly
  • System freezing during heavy tasks
  • Installation failures
  • Corrupted files

Since RAM issues are hardware-related, software fixes alone won’t solve them. That’s where Windows Memory Diagnostic becomes useful.

How to Run the Tool

You can start the test in a few simple steps:

  1. Press Win + R
  2. Type mdsched.exe
  3. Press Enter
  4. Choose:
    • Restart now and check for problems
    • Check for problems the next time I start my computer

Your PC will restart and begin testing memory automatically.

During the test:

  • A blue screen appears
  • Progress percentage is displayed
  • You can press F1 for advanced options (Basic, Standard, Extended tests)

The Extended test is more thorough but takes longer.

Understanding Test Results

After the test completes, Windows restarts normally. Results appear as a notification in the system tray.

Possible outcomes:

  • No errors found → RAM is likely healthy.
  • Hardware problems detected → One or more RAM modules may be faulty.

If errors are found:

  • Reseat RAM modules (if comfortable opening your PC).
  • Test sticks individually.
  • Replace faulty memory if needed.

This tool helps confirm whether crashes are hardware-related before spending money on repairs.

11. Device Manager – Control Your Hardware

Device Manager is your control center for hardware in Microsoft Windows. It allows you to view, manage, update, enable, disable, and troubleshoot all connected devices.

Updating Drivers

Outdated drivers can cause:

  • Poor performance
  • Hardware not working properly
  • Crashes or compatibility issues

To update a driver:

  1. Right-click Start → Select Device Manager
  2. Expand a category (e.g., Display adapters)
  3. Right-click the device → Choose Update driver
  4. Select Search automatically for drivers

You can also install drivers manually from the manufacturer’s website if needed.

Fixing Unknown Devices

If you see a yellow warning icon:

  • It indicates missing or problematic drivers.
  • Right-click → Properties → Check Device status.
  • View the Hardware IDs under Details to identify the device.
  • Download the correct driver from the official manufacturer.

Unknown devices are common after a fresh Windows installation.

Enabling & Disabling Hardware

Device Manager also allows you to:

  • Disable unused hardware (like an old webcam)
  • Enable disabled network adapters
  • Uninstall problematic drivers
  • Roll back drivers if a recent update caused issues

Driver rollback is especially helpful if your PC started malfunctioning after a driver update.

Device Manager gives you precise hardware-level control without needing external tools.

12. Resource Monitor – Advanced Performance Tracking

While Task Manager shows basic usage statistics, Resource Monitor provides a much deeper look into system activity in Microsoft Windows.

It helps diagnose performance bottlenecks with greater precision.

How to Open Resource Monitor

  • Press Win + R
  • Type resmon
  • Press Enter

Or open Task Manager → Performance tab → Click Open Resource Monitor.

Monitoring CPU, Disk, and Network Usage

Resource Monitor provides detailed tabs for:

CPU Tab

  • Shows which processes are using CPU
  • Displays associated services
  • Shows threads and handles

Memory Tab

  • Displays used, standby, free memory
  • Identifies memory-hungry processes

Disk Tab

  • Shows real-time disk activity
  • Displays read/write speeds
  • Identifies which file each process is accessing

Network Tab

  • Shows active TCP connections
  • Displays send/receive rates
  • Identifies which apps use internet bandwidth

This level of detail helps pinpoint the exact cause of slow performance.

Identifying Background Processes

If your PC feels slow but Task Manager doesn’t show obvious issues, Resource Monitor can reveal:

  • Hidden background services
  • Disk-intensive applications
  • Programs constantly accessing the network
  • Processes waiting on hardware resources

You can also right-click processes to:

  • End process
  • Analyze wait chain (see what’s blocking a process)
  • Search online for more information

When to Use Resource Monitor Over Task Manager

Use Resource Monitor when:

  • Disk usage is stuck at 100%
  • Internet feels slow, but the bandwidth seems normal
  • CPU usage spikes randomly
  • You need to see which specific file a program is accessing
  • Troubleshooting advanced performance issues

Task Manager is great for quick checks. Resource Monitor is better for deep diagnostics.

13. System Restore – Undo Major Problems

Windows can sometimes behave unpredictably after installing new software, drivers, or updates. System Restore is a built-in tool in Microsoft Windows that allows you to roll back your system to a previous stable state, protecting your system without affecting personal files like documents or photos.

Creating Restore Points

A restore point is a snapshot of your system’s settings and critical files at a specific moment. While Windows automatically creates restore points during major updates or system changes, it’s wise to create them manually before installing new software or drivers.

Steps to create a restore point:

  1. Search for “Create a restore point” in the Start menu.
  2. Open the System Protection tab.
  3. Select your system drive (usually C:) and click Configure to ensure protection is enabled.
  4. Click Create, give it a descriptive name (e.g., “Before Driver Update”), and confirm.

This gives you a safety net to undo system changes if something goes wrong.

Restoring Windows Safely

If your system becomes unstable:

  1. Open System Restore from the Start menu.
  2. Click System RestoreNext.
  3. Select the restore point you want to revert to.
  4. Click Scan for affected programs to see what will be removed or restored.
  5. Click Next → Finish and allow Windows to restart.

What System Restore changes:

  • System files
  • Installed programs
  • Drivers
  • Registry settings

What it doesn’t change:

  • Personal files like documents, photos, and videos

When System Restore Helps

Use System Restore when:

  • A new driver or software causes crashes or errors
  • Windows becomes unstable after an update
  • System settings are corrupted
  • Programs stop working after recent installations

It is not effective for hardware failures, deleted personal files, or severe malware infections, but it’s one of the safest ways to fix system-level issues quickly.

14. Snipping Tool & Screenshot Shortcuts

Capturing screenshots is essential for documenting errors, sharing information, or creating tutorials. Windows includes a simple yet powerful tool: Snipping Tool in Microsoft Windows.

Capturing Screenshots Quickly

Snipping Tool app:

  1. Search for Snipping Tool in the Start menu.
  2. Click New and choose your snip type:
    • Rectangular
    • Freeform
    • Window
    • Fullscreen

The screenshot opens automatically in the editor for saving or annotation.

Keyboard shortcuts for faster captures:

  • Win + Shift + S → Opens quick snip overlay
  • PrtScn → Copies full screen to clipboard
  • Alt + PrtScn → Captures active window
  • Win + PrtScn → Saves full screen to Pictures → Screenshots

Annotating Images

Once captured, Snipping Tool allows you to:

  • Highlight important areas
  • Draw with pen or highlighter
  • Crop images
  • Save in PNG, JPG, or GIF format

These features are useful for bug reports, tutorials, presentations, or quick visual notes.

15. Backup & File History

Even with system restore and troubleshooting tools, personal files can be lost due to accidental deletion, hardware failure, or ransomware. File History in Microsoft Windows ensures your important files are backed up automatically.

Protecting Important Files

File History can back up:

  • Documents
  • Pictures
  • Videos
  • Music
  • Desktop files

It keeps multiple versions of files, allowing you to restore previous versions if needed.

Setting Up Automatic Backups

Steps to enable File History:

  1. Connect an external hard drive or network storage.
  2. Go to Settings → Update & Security → Backup.
  3. Click Add a drive and select your backup location.
  4. Turn on Automatically back up my files.

Advanced options:

  • Set backup frequency (e.g., every hour or daily)
  • Choose a retention period for older versions
  • Exclude unnecessary folders

Automated backups ensure continuous protection without manual effort.

Restoring Deleted Files

If a file is lost:

  1. Navigate to the folder where it was stored.
  2. Right-click → Restore previous versions
    OR search Restore your files with File History.
  3. Browse the timeline, select the version, and click Restore.
  4. Optionally, restore to a different location to avoid overwriting current files.

By combining System Restore, Snipping Tool, and File History, you gain a complete built-in Windows toolkit:

  • System recovery and stability (System Restore)
  • Productivity and documentation (Snipping Tool)
  • Data protection and backup (File History)

These tools allow you to manage, protect, and troubleshoot your system without relying on third-party software.

16. Windows Troubleshooters

Windows includes a variety of automated troubleshooters designed to quickly detect and fix common issues, making them an ideal first step before diving into more advanced diagnostics. These built-in troubleshooters save time and help prevent unnecessary changes that could worsen problems.

Network Troubleshooter

When your PC can’t connect to the internet or experiences intermittent connectivity, the Network Troubleshooter identifies and resolves common network problems.

How it works:

  • Checks if network adapters are enabled
  • Verifies IP configuration and gateway reachability
  • Resets network stacks and services if needed

How to run:

  1. Open Settings → System → Troubleshoot → Other troubleshooters
  2. Click Run next to Network Adapter
  3. Select the adapter to test (Wi-Fi, Ethernet)

This often resolves issues without manual commands. For persistent problems, you may combine it with ipconfig /flushdns and netsh network reset commands.

Update Troubleshooter

When Windows Update fails, stalls, or keeps rolling back, the Update Troubleshooter automatically repairs the underlying components.

Tasks performed:

  • Stops and restarts Windows Update services
  • Clears temporary update files
  • Fixes permissions and registry issues
  • Provides guidance when manual intervention is required

How to run:

  • Settings → System → Troubleshoot → Other troubleshooters → Windows Update → Run

For stubborn issues, follow up with DISM /Online /Cleanup-Image /RestoreHealth and then run sfc /scannow.

Hardware & Device Troubleshooting

For devices not recognized or malfunctioning:

  • Identifies driver or configuration issues
  • Suggests solutions for unknown devices
  • Can run a guided check for internal and external hardware

Access:

  • Press Win + R → msdt.exe -id DeviceDiagnostic
  • Or use Device Manager to check status, update drivers, and scan for hardware changes

Use this when printers, USB devices, or peripherals fail unexpectedly.

17. Hidden Advanced Tools (Bonus Section)

These are more powerful, often overlooked Windows utilities. They provide deeper system control but should be used carefully.

Services Manager (services.msc)

Manages all Windows services:

  • Start, stop, restart services
  • Configure startup type: Automatic, Manual, Disabled
  • Review service dependencies
  • Set recovery actions for service failures

Use cases:

  • Disable unnecessary startup services
  • Restart stuck services like Print Spooler

⚠️ Do not disable critical Microsoft services — research first.

Local Group Policy Editor (gpedit.msc) – Pro Editions

Allows centralized management of the system and security policies:

  • Enforce password policies
  • Control Windows Update behavior
  • Restrict apps and scripts

Note: Not available in Windows Home. Changes affect all users on the PC, so document modifications carefully.

Performance Monitor (perfmon)

Advanced monitoring for diagnosing bottlenecks:

  • Real-time CPU, memory, disk, and network stats
  • Create Data Collector Sets for logs
  • Generate performance reports for detailed analysis

Best for: Intermittent slowdowns, scheduled task diagnostics, and detailed performance tracking.

Steps Recorder (psr.exe)

A lightweight tool that records user actions with screenshots:

  • Opens with Win + R → psr
  • Start recording, perform the steps causing the problem
  • Stops recording and saves a file with annotated screenshots

Useful for troubleshooting, bug reporting, and creating step-by-step guides.

18. Best Practices for Using Built-In Tools Safely

Even the best tools can create problems if used carelessly.

Avoiding Common Mistakes

  • Don’t disable random services or system apps
  • Avoid deleting system folders or registry entries blindly
  • Backup before running repair commands like chkdsk /f /r
  • Review logs before acting on Event Viewer entries

When to Use Advanced Tools Carefully

  • Group Policy & Services Manager: Test changes in a controlled environment
  • DISM & SFC: Ensure the correct image source is used
  • Performance Monitor: Understand metrics before making performance decisions
  • Steps Recorder: Review recordings for sensitive data before sharing

Creating Backups Before Major Changes

  • Always make a System Restore point
  • Backup critical files using File History or external storage
  • Consider a full system image for major OS changes
  • Keep a Windows recovery drive ready for emergency repairs

19. Conclusion

Windows’ built-in tools offer comprehensive maintenance, troubleshooting, and productivity capabilities:

  • Recovery: System Restore, Windows Memory Diagnostic
  • Monitoring: Task Manager, Resource Monitor, Reliability Monitor
  • Protection: Windows Security, File History
  • Diagnostics: Event Viewer, Troubleshooters, Performance Monitor

These tools are often faster, safer, and more integrated than third-party alternatives. Start using them today to keep your PC stable, secure, and optimized — no additional software required.

Related Post